Showing posts with label BUZZCOIL. Show all posts

Friday, September 8, 2023

Alan Gorlick's BuzzCoil Review and Comments

 Hi

Just a note to let you know the "buzz coil" ignition module kit, spark plug & hall effect sensor are installed and working well on a hit & miss engine that I have just finished, it's based on a David Kerzel design. 

I am using a 2mm x 1mm magnet set in the cam gear at 0.5" radius which works very well at the low speed of this engine. The hall effect sensor is epoxied onto an arm that can pivot around the cam gear shaft as suggested in your notes. That change to Mr Kerzel's design made setting the ignition timing extremely simple and precise. The coil is a universal ATV coil and is the only thing in the ignition system that has caused any problems. The first one had a loose primary terminal.

I did successfully bench test the spark saver circuit with a second hall effect sensor but have only installed the single sensor circuit as battery capacity has not been an issue. I am using a 6V 4.5ah rechargeable lead acid battery (AGM type) which I haven't had to recharge yet and cost very little more than a pack of 4 AA energisers and case.

One low cost change that I suggest you could make to your kit is to use an 8 pin IC socket that is soldered onto the PCB first and the 555 Timer IC just clips into that socket after everything else is installed. It removes any risk of exposing the 555 to the heat of soldering and allows easy replacement of the timer if ever required.

Thanks for the quality product,

Regards
Alan Gorlick
Bundaberg, Queensland, Australia


Friday, April 8, 2022

BuzzCoil Ignition Module and ATV Coil Bench Testing

Before you install your new BuzzCoil ignition system on your engine, I highly recommend you do a simple bench test with it and all the components. This way you will be more familiar with it and see how it actually works. Otherwise, once installed on the engine, issues sometimes show up such as bad connections and open grounds - making it much more difficult to diagnose the system as a whole.

Once you get it working on the bench, proceed by installing just ONE component at a time on the engine, and re-test. If it still works, install the next component and re-test. Repeat until the entire system is installed. If it quits working after you installed a particular component, then you know you have a connection problem with that component.


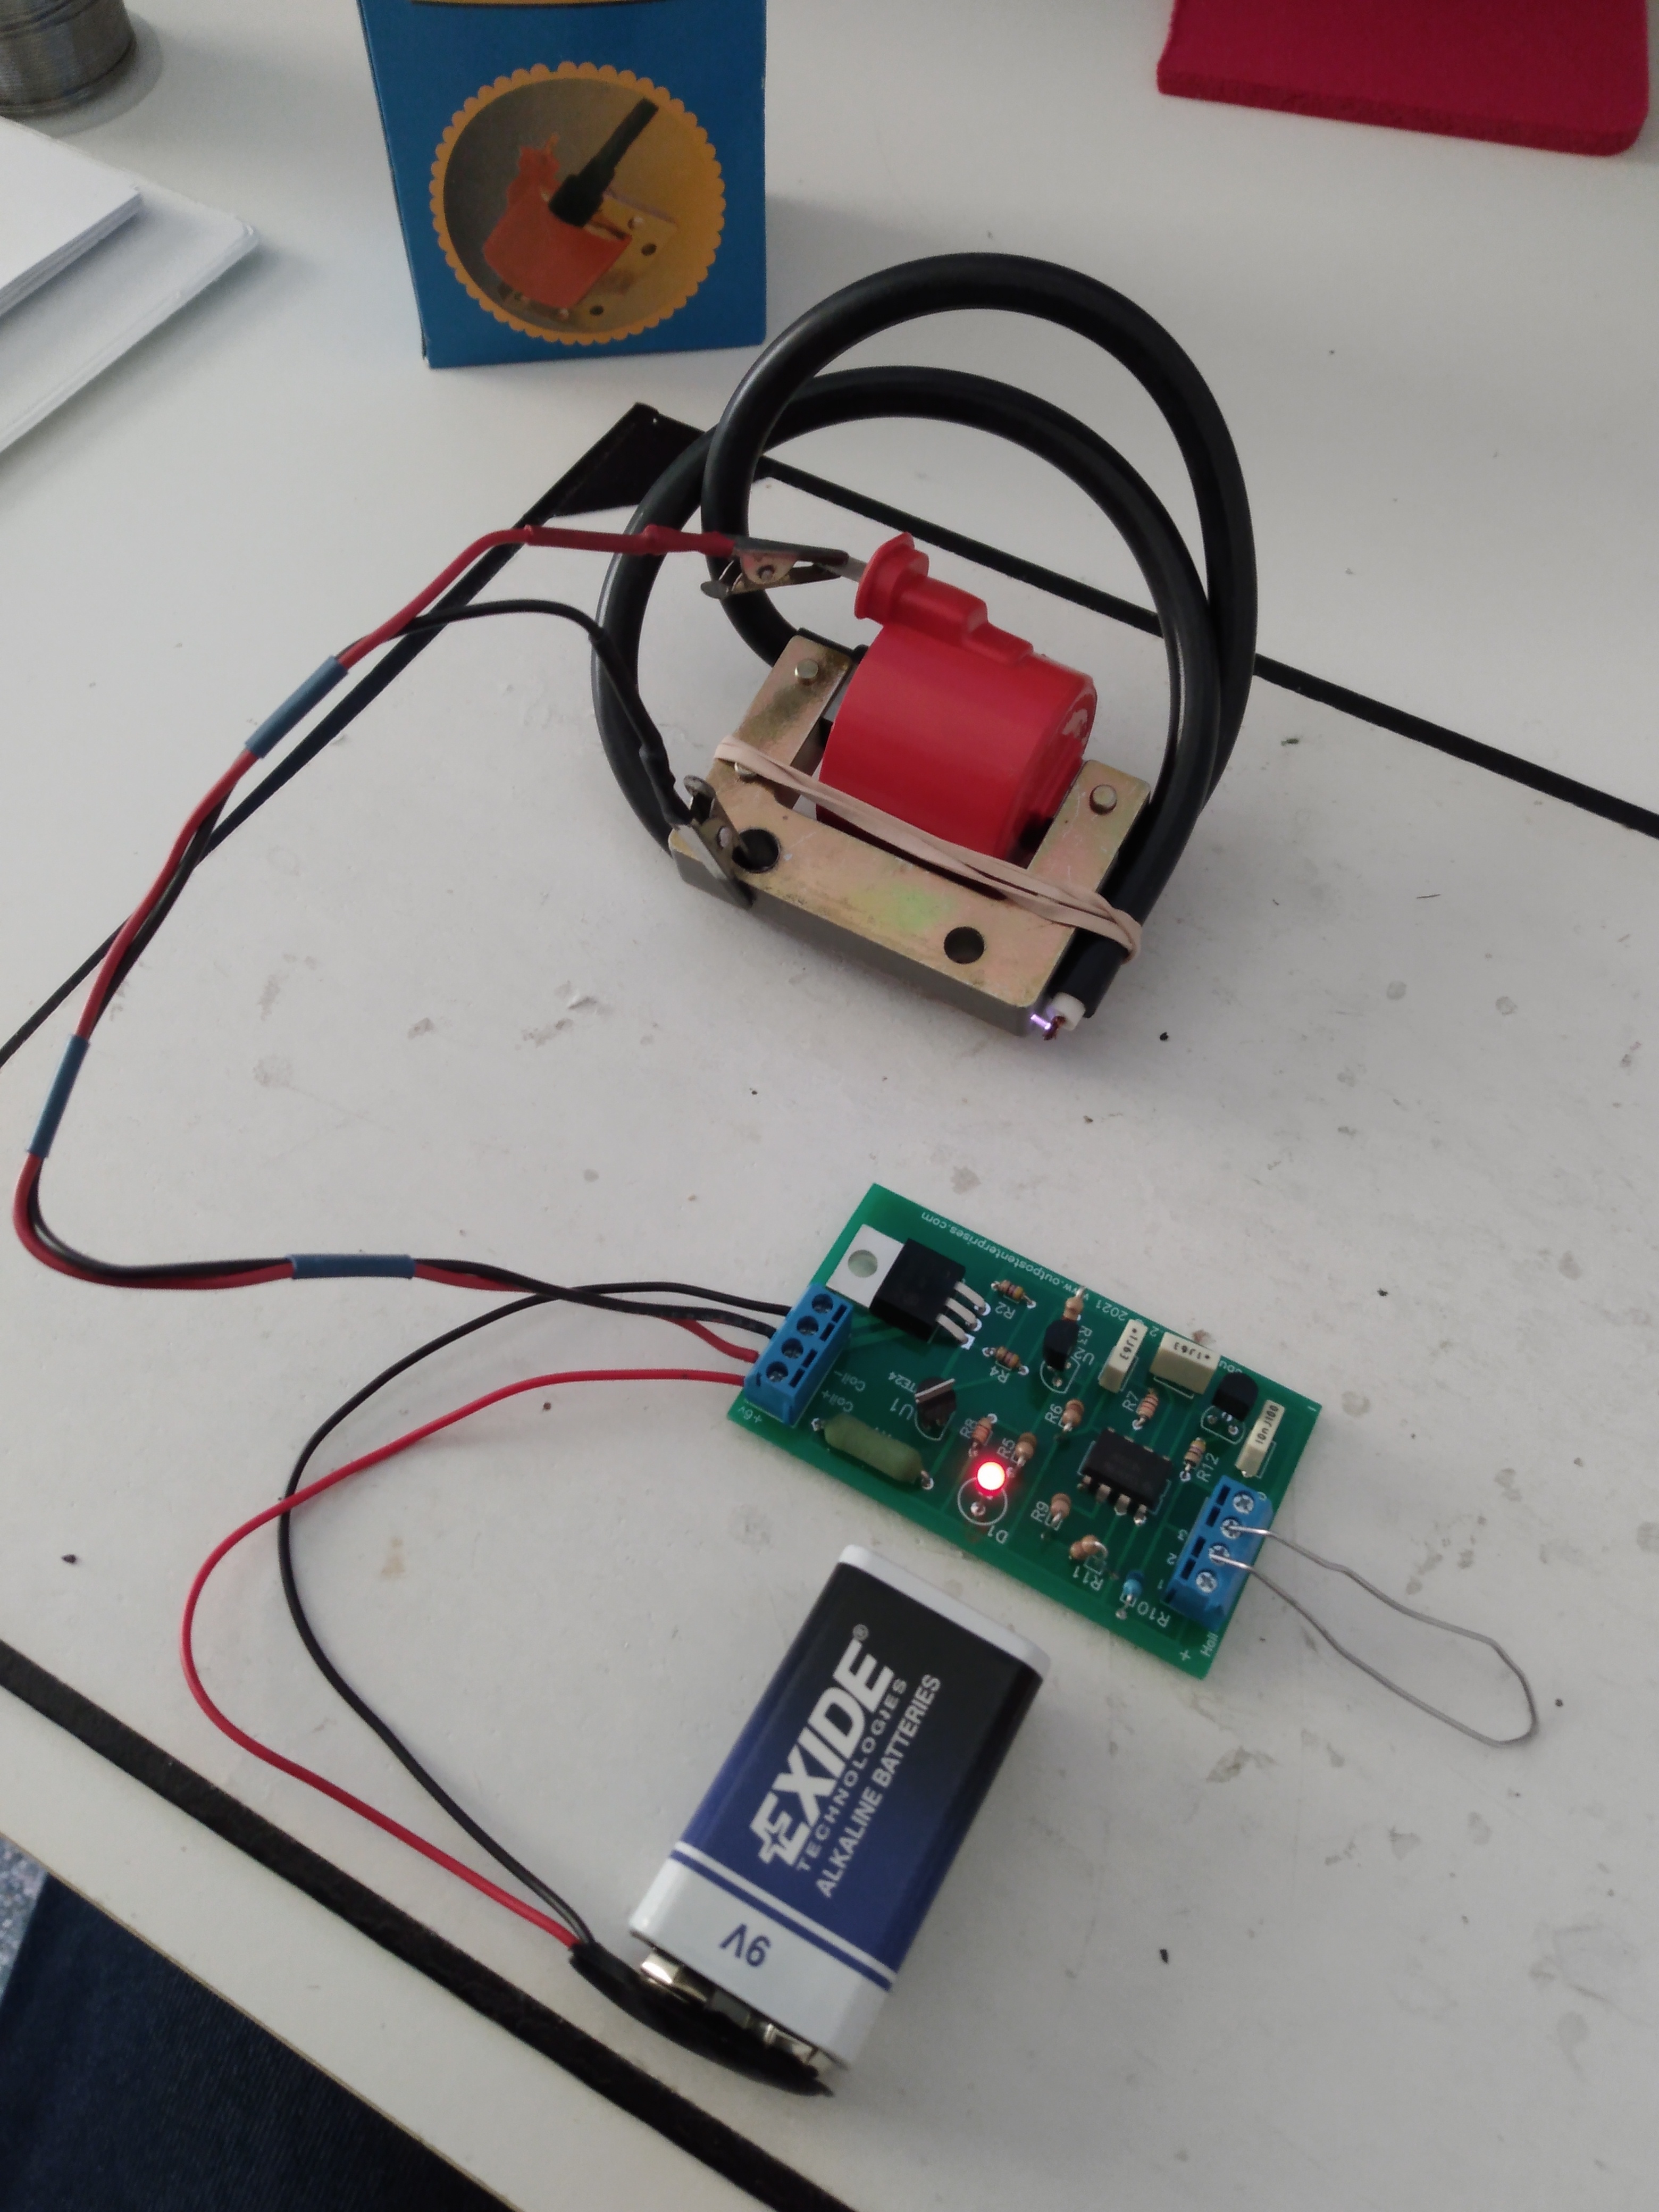
See the photos below for how I bench test the BuzzCoil with the ATV coil.
  1. The tab on the coil connects to "Coil +" and the coil frame is connected to "Coil -" on the BuzzCoil module.
  2. Cut the end of the coil's spark plug cable so that about 1/8" of the copper wire is exposed.  Secure the spark plug wire to the coil frame so that the exposed wire is 1/16" to 1/8" from the coil frame.  No more, no less or you can damage the coil.  The spark will jump here.
  3. Connect your battery (I use a 9v smoke alarm battery) to "Batt +" and "Batt-" on the module.  
  4. Using a bent paper clip, quickly touch and release positions 2 and 3 on the switch connection block.  This simulates a "points" system.  Each time you make a connection you should see the LED light up and a "shower of sparks" will jump across the gap of the spark plug wire and the coil frame.

(Click photo to enlarge)

If this is successful, and if your setup will be using the Hall/Magnet switch, then resume testing:
  1. Disconnect Batt +.
  2. Hook up the Hall sensor directly to the switch block following the BuzzCoil wiring diagram PDF, or alternatively use steps 3-4:
  3. With the Hall's beveled edge facing down, insert the Hall Sensor into the switch terminal block positions 1,2 and 3.
  4. With your needle nose pliers, grasp the Hall legs in the middle and bend the head up.
  5. Reconnect Batt +.

Wave your magnet's south pole across the face of the Hall sensor.  At each pass, the LED should light and sparks should jump between the coil spark plug wire and frame.


(click photo to enlarge)

Final Test:

As a final test before you install anything on your engine, connect the spark plug to the coil.  In the case of the ATV coil, connect the spark plug wire to the top of the spark plug, and position the plug threads so they touch the coil frame.  A rubber band may be helpful to hold it in place.

When you test now, you should see the spark in the spark plug gap.  If not, check connections, or you may have a faulty spark plug.

-----------------------------------------------------------------------------------------------------------------------

If these test pass, you are ready to install the system on your engine.  I would install the components in the following order, testing that everything still works IN BETWEEN each component install:
  1. Spark Plug
  2. Points or Hall/Magnet 
    1. Make sure the Hall sensor install, and it's wires, are well insulated from the engine frame.  Some of our instructions recommend you also ground the module (from the "Gnd" on the board terminal block) to the engine frame.  This is to provide a path for the coil's high voltage to ground in case the Hall sensor or wiring is too close to the engine. If you're getting good spark after installing the spark plug, hold off on this step.  However, if your have a problem with Hall sensors blowing out, try this ground.
  3. BuzzCoil module
  4. Battery
If these steps are followed, you are much more likely to have a trouble-free install.  If you have any trouble along the way and just can't figure it out, feel free to e-mail allen@outpostenterprises.com with photos and a detailed description of the problem, and I will do my best to assist.

Good luck!

Wednesday, November 2, 2016

PICTIM ignition module runs fine on 9v smoke alarm battery

PICTIM ignition module running on a standard 9v battery for the past two hours.  For this demo, the PIC chip has been programmed to simulate a 4-cycle running at 2000 RPM.  Visit www.model-engine-ignition.com for more details.

See this link for YouTube video:

https://youtu.be/yHBO0y3P4e4

Note: BUZZCOIL ignition works great on 9v as well!

Tuesday, November 19, 2013

The electronic buzz coil kit is now back!

Back by popular demand is a new, improved electronic buzz coil ignition module.  What's a "buzz coil"?  It's very similar to the TIM-6 ignition module except that instead of generating one spark for each power stroke, the buzz coil can generate dozens for each power stroke (200 per second - duration depends on the "dwell angle").  This greatly improves combustion for slower hit-and-miss or older engines that may not have much compression.   The new PCB is slightly larger than Jerry's handmade PCB and displays part outlines and labels for easier assembly.  Also included are wire terminal blocks to make wire hookup much easier.

For more details and prices, see the following link: